
Faulty outlets cause more than 5,300 house fires every year, according to the NFPA. Most homeowners ignore the warning signs until something goes wrong. Don’t be one of them.
Replacing a standard outlet is a legitimate DIY job if the conditions are right. It takes 20 minutes, costs $5–10 in materials, and requires no special license.
But the moment you see sparks, smell burning, or find unfamiliar wiring in that box, the job belongs to a licensed electrician.
This guide covers both sides: how to do it right yourself, and when walking away is the smarter call.
BLUF: Kill the breaker, confirm zero voltage, swap black-to-brass and white-to-silver, test. That’s the job, when it’s straightforward. Aluminum wiring, GFCI installs, sparks, or crowded boxes? Call a pro. Outlet fires don’t give second chances.
Is Your Outlet Actually Failing?
Not every dead outlet needs replacing. Some trips a breaker. Some are controlled by a wall switch. Before you pull anything apart, know what you’re actually dealing with.
These five signs tell you an outlet is failing and whether you can handle it yourself:
- Scorch marks or discoloration: Heat damage. The outlet has already been overloaded or arced.
- Warm to the touch: Active heat buildup. That’s not normal and it’s not safe.
- Loose or wobbly plugs: The internal contacts are worn. Devices won’t charge reliably and connections can arc.
- Dead outlet with no marks: Often a tripped breaker or a downstream GFCI. Check those first.
- Buzzing, crackling, or burning smell: Stop. Do not use this outlet. This is an emergency.
| Sign | DIY? | Urgency |
| Dead outlet (no marks) | Yes | Low |
| Loose plugs | Yes | Medium |
| Warm to the touch | No | High |
| Buzzing / crackling | No | High |
| Scorch marks / sparks | No | Immediate |
If it’s on the left side of that table, keep reading. If it’s on the right, skip to the When to Call an Electrician section now.

Tools & Materials You’ll Need
No special equipment. No expensive gear. Here’s exactly what the job requires before you touch anything:
- Non-contact voltage tester
- Flathead and Phillips screwdrivers
- Needle-nose pliers
- Wire stripper
- Replacement outlet (match your existing amperage, typically 15A or 20A)
- Electrical tape
| Item | Purpose | Est. Cost |
| Non-contact voltage tester | Confirm power is off before touching wires | $15–25 |
| Flathead & Phillips screwdrivers | Remove cover plate and outlet screws | $0–10 |
| Needle-nose pliers | Bend wire loops around terminal screws | $5–10 |
| Wire stripper | Strip backstabbed wires to proper length | $8–15 |
| Replacement outlet | 15A or 20A to match existing circuit | $2–5 |
| Electrical tape | Insulate connections and exposed terminals | $2–3 |
One note on the voltage tester: this is not optional. It is the difference between a safe repair and a serious injury. If you don’t own one, buy one before this job starts.
How to Replace an Outlet: Step-by-Step
Read all five steps before you start. Understand the full sequence first. Then work.
Step 1: Cut the Power at the Breaker
Go to your electrical panel and locate the breaker controlling the outlet. Flip it off. Return to the outlet and plug in a lamp or device to confirm it lost power.
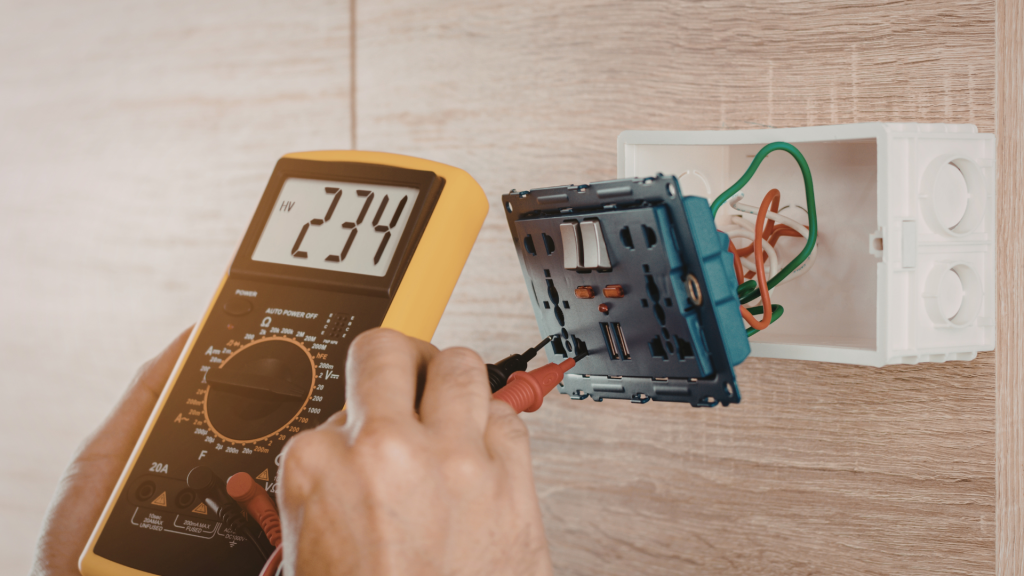
Then use your non-contact voltage tester on both slots of the outlet. No beep, no light. That is your green light to proceed.
Do not skip the tester. Breaker labels are frequently wrong. Panels in older homes are often mislabeled entirely.
⚠ Warning: Confirmed zero voltage on the tester is the only acceptable reason to touch those wires. Visual confirmation is not enough.
Step 2: Remove the Cover Plate and Old Outlet
Unscrew the center screw on the cover plate and set it aside. You will reuse it. Next, unscrew the two mounting screws holding the outlet to the electrical box and gently pull the outlet straight out. Do not yank. Give yourself enough slack to work comfortably.
Before you touch a single wire, take a clear photo of all connections. This is your reference if anything gets confusing during reassembly.
Step 3: Disconnect the Old Outlet
Loosen each terminal screw and release the wires. If the wires are backstabbed, meaning inserted into the rear push-in holes rather than wrapped around screws, do not reuse those connections on the new outlet.
Cut the wire just behind the backstab point and use your wire stripper to expose a fresh half inch of copper. Backstab connections are a leading cause of outlet failure and arc faults. Leave them behind.
Step 4: Wire the New Outlet
This step has no room for guessing.
- Black wire to the brass screw (hot)
- White wire to the silver screw (neutral)
- Bare copper or green wire to the green screw (ground)
Wrap each wire clockwise around its screw so tightening pulls the wire in, not away. Tighten firmly. No copper should be visible outside the connection. If it is, loosen, reposition, and tighten again.
⚠ Warning: Reversed wires will energize the neutral and create a live shock hazard at every device plugged into this outlet. If you are not certain which wire is which, stop and call a licensed electrician.
Step 5: Test, Secure, and Finish
Carefully fold the wires back into the box. Do not force them. Screw the outlet into the box, restore power at the breaker, and plug in a lamp or use an outlet tester to confirm correct operation.
No sparks. No tripped breaker. Correct polarity on the tester. Attach the cover plate and the job is done.
⚠ Warning: Any sparks, burning smell, or immediately tripped breaker after restoring power means cut the breaker again immediately. Do not retry. Call a licensed electrician.
When You Should Call an Electrician
A standard outlet swap is manageable. These situations are not. Attempting them without proper training and tools creates fire and shock hazards that go beyond the outlet itself.
Call a licensed electrician if you encounter any of the following:
- Aluminum wiring: Homes built before 1975 may have aluminum branch wiring instead of copper. It requires special outlets, connectors, and handling. Standard copper techniques applied to aluminum wiring are a fire hazard.
- GFCI installation: Ground fault circuit interrupters involve line and load wiring that controls downstream outlets. Miswiring a GFCI does not just fail it, it can disable protection across multiple outlets without any visible indication.
- Sparks, smoke, or burning smell: At any point during or after the job, this is not a troubleshooting situation. This is an emergency. Cut the breaker and call a pro.
- Multiple sets of wires in the box: A outlet with more than one cable running through it is likely on a multiwire branch circuit. These require specific handling to avoid overloads and shock risk during service.
- Any wiring you do not recognize or understand: Unknown wire colors, extra conductors, or unfamiliar configurations are a hard stop. Guessing inside an electrical box is how fires start.
| Issue | DIY? | Typical Pro Cost |
| Standard outlet swap | Yes | N/A |
| GFCI installation | Caution | $100–150 |
| Aluminum wiring | No | $150–250 |
| Sparks / smoke | No | $150–300+ |
| Multiple wires in box | No | $100–200 |
A licensed electrician charges $100–300 for most single-outlet situations. That is a fraction of the cost of a structure fire, an insurance claim, or a burn injury.
Common Mistakes That Turn a Simple Job Into a Hazard
Skipping the voltage tester. The breaker being off is not confirmation the wires are dead. Test every time, on every wire, before you touch anything.
Leaving loose terminal screws. A wire that is not fully secured will arc. Arcing generates heat. Heat starts fires inside walls where no one sees it coming.
Using backstab connections on the new outlet. Push-in backstab connections are permitted by code but are consistently less reliable than screw terminals. Use the screws. Always.
Mismatching wire colors. Black to silver or white to brass reverses polarity across the entire outlet. Every device plugged in becomes a shock risk. Photograph before you disconnect. Verify before you reconnect.
Frequently Asked Questions
How do I know the power is actually off?
Flip the breaker, confirm the outlet loses power with a plugged-in device, then test both slots with a non-contact voltage tester. All three steps. Not just one.
Can a beginner really do this?
On a straightforward single-cable outlet with no signs of damage, yes. If anything inside that box looks unfamiliar, burnt, or crowded, close it up and call a pro.
Is a GFCI outlet harder to replace?
Yes. GFCI outlets have line and load terminals that must be wired correctly to protect downstream outlets. A miswired GFCI can appear to work while providing zero protection. Proceed with caution or hire out.
What if my outlet has multiple sets of wires?
Stop. Multiple cables indicate a multiwire branch circuit or a pass-through configuration. Either scenario requires additional knowledge to service safely.
How much does an electrician charge for outlet work?
Most single-outlet jobs run $100–250 depending on complexity and location. Aluminum wiring, GFCI, or panel-related work will run higher.
The Bottom Line
A basic outlet swap is a legitimate DIY repair. Done correctly, it takes 20 minutes and costs less than $10. Done wrong, it creates a fire hazard inside your wall that may not show up for months.
Inspect your outlets yearly. Know the warning signs. And when the job exceeds what this guide covers, call a licensed electrician. That call is always cheaper than the alternative.